
A well is one of the most important parts of a home, farm, or business that does not use city water. When a well is built the right way, it can provide clean, steady water for many years.
At Wheels Water Service in Melrose, MN, we work with wells every day. Well construction takes planning, the right equipment, and careful work from start to finish. Here is a simple explanation of how a well is constructed and what property owners should know before drilling begins.
What Is a Water Well?
A water well is a drilled hole that reaches underground water. That water is often found in layers of sand, gravel, or rock. Once the well reaches a good water source, a pump system brings the water up and sends it into the home, shop, barn, or business.
A well is more than just a hole in the ground. It includes the casing, sealing materials, pump, pressure tank, water lines, and other parts that all have to work together.
Step 1: Looking Over the Property
Before any drilling starts, the property needs to be checked. The goal is to find a safe and practical place for the well.
A well should be placed away from things that could affect the water, such as:
- Septic tanks and drain fields
- Fuel tanks
- Livestock areas
- Chemical storage
- Old wells
- Low spots where water collects
The well also needs to be in a spot where the drill rig can safely reach it. There has to be enough room for the equipment, trucks, and materials.
Step 2: Choosing the Best Well Location
Picking the right location matters. A poor location can lead to problems later, including water quality issues, hard access for repairs, or trouble running water lines to the building.
When choosing a well site, we look at the layout of the property, nearby buildings, driveways, septic systems, and the distance to where the water will be used.
In Minnesota, wells also have to follow state rules for spacing and construction. These rules help protect drinking water.
Step 3: Handling Permits and Requirements
Well construction must be done by licensed professionals. This is not a project to guess your way through. Wells have to meet Minnesota well code requirements.
Before drilling, the proper permits and records need to be handled. This helps make sure the well is built safely and that there is a clear record of the well for the property.
Step 4: Bringing in the Drilling Equipment
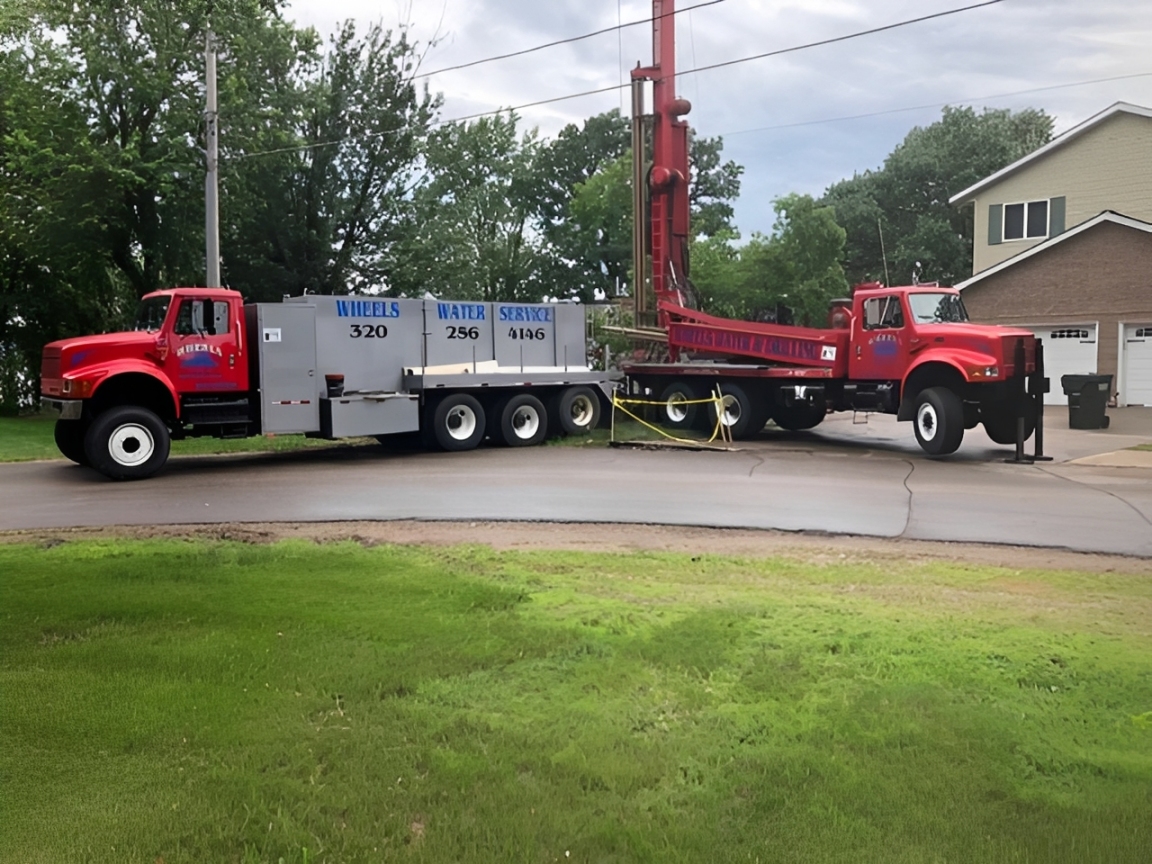
Once the site is ready, the drilling equipment is moved into place. A drill rig is used to bore down through the ground.
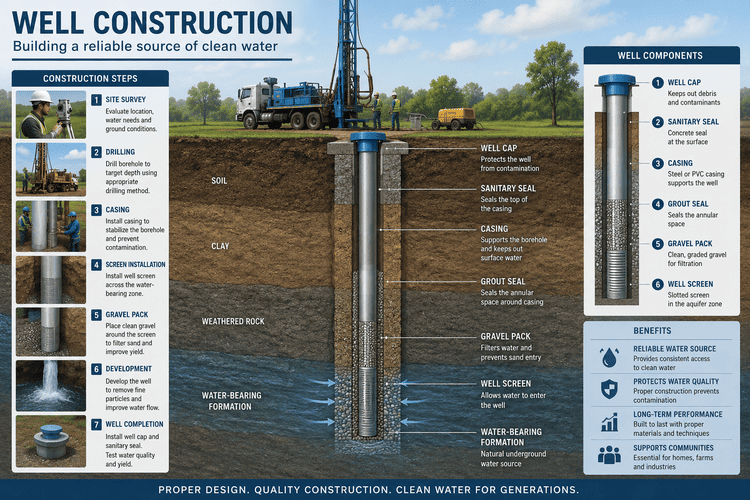
The ground can change a lot from one property to the next. In the Melrose area, a well may pass through layers of soil, clay, sand, gravel, and rock. The depth depends on where a good water source is found.
Some wells are not very deep. Others need to go much deeper before they reach enough water.
Step 5: Drilling the Well
During drilling, the hole is made deep enough to reach water-bearing material. The driller watches the ground conditions and the amount of water being found.
The goal is not just to hit water. The goal is to build a well that can provide enough water for the property’s needs.
A house may need water for showers, laundry, dishes, and outdoor use. A farm may need water for livestock, cleaning, or other daily work. The well has to match the job.
Step 6: Installing the Well Casing
After the well is drilled, a casing is installed. The casing is a strong pipe that lines the well and keeps the hole open.
The casing also helps protect the water from dirt, loose material, and shallow surface water. Without a proper casing, the well would be much more likely to have problems.
The top of the casing extends above the ground. This helps keep rainwater, snowmelt, and debris from getting into the well.
Step 7: Sealing Around the Casing
The space around the outside of the casing must be sealed. This is a very important step.
The seal helps stop surface water from running down the outside of the casing and entering the well. Surface water can carry bacteria, fertilizers, chemicals, and other things that do not belong in drinking water.
A properly sealed well is safer and better protected.
Step 8: Developing the Well
After drilling, the well may need to be developed. This means cleaning out fine sand, drilling material, and loose particles so the water can flow better.
Well development helps improve water flow and can help clear up the water. It is part of getting the well ready for regular use.
Step 9: Installing the Pump
Once the well is ready, the pump system is installed. The pump moves water from the well to the building.
The type and size of pump depend on:
- Well depth
- Water level
- How much water the property needs
- Distance from the well to the building
- Pressure needs
A pump that is too small may not keep up. A pump that is not installed correctly can wear out early. The pump system needs to fit the well and the property.
Step 10: Connecting the Water Lines
Water lines carry the water from the well to the home, shop, barn, or business. In Minnesota, these lines must be buried deep enough to help protect them from freezing.
The water line is usually connected to a pressure tank inside the building. The pressure tank helps control water pressure and keeps the pump from turning on and off too often.
Step 11: Checking Water Flow and Pressure
After the pump and water lines are connected, the system is tested. The water flow and pressure are checked to make sure the system is working the way it should.
Good pressure makes everyday water use easier. Poor pressure can be a sign of a pump issue, pressure tank problem, clogged line, or a well that is not producing enough water.
Step 12: Testing the Water
Water testing is an important part of owning a well. A new well should be tested to check the quality of the water.
Testing can look for common concerns such as bacteria, nitrates, iron, hardness, and other issues. Some water problems are easy to notice, like staining, smell, or bad taste. Others may not be obvious without a test.
If the water test shows a problem, there may be treatment options that can help.
How Long Does It Take to Construct a Well?
The time it takes can vary. Some wells can be drilled and set up fairly quickly. Others take longer because of depth, ground conditions, weather, or the layout of the property.
Before the work starts, it helps to talk through the process so you know what to expect.
How Deep Does a Well Need to Be?
There is no single depth that works for every property. Well depth depends on the underground water source in that area.
Two properties near each other may still have different well depths. That is why experience matters. A good well contractor understands how to read the ground conditions and build the well properly.
Signs Your Well May Need Service Later
After a well is built, it should be watched over like any other important system. Call for service if you notice:
- Low water pressure
- No water
- Air coming from faucets
- Cloudy or dirty water
- Water that smells different
- Pump running too often
- Sudden changes in water taste
- Sand or grit in the water
Small problems can turn into bigger repairs if they are ignored.
Why Proper Well Construction Matters
A well that is built correctly helps protect your water, your pump system, and your property. Poor construction can lead to water quality problems, low production, pump damage, and costly repairs.
Good well construction starts with the right location and ends with a system that is tested and working properly.
Well Drilling and Well Service in Melrose, MN
If you need a new well, well repair, pump service, or well maintenance, Wheels Water Service can help.
We serve Melrose, MN and nearby areas. Whether you are building a new home, replacing an old well, or having trouble with your current system, we can look at the situation and explain your options in plain language.